It is now just two weeks before we open our doors to an enthusiastic group of pizza oven course participants. So on Saturday we thought it was about time we got round to making the base that our oven will sit on.
Neel and I tend to work on the principal that if it is lying around the farm it will get worked in to the design somewhere. And so true to form, our ‘ingredients’ list ended up consisting of ……..

- used tyres from our friendly local garage
- earth and stones dug up when we had the farm gateway resurfaced
- clay from digging the hole for Grow’s water collection tank
- wine and beer bottles from our own embarrassing pile of recycling
- builder’s sand from the pile that the children insist on jumping on
- heat bricks from an old storage heater
The main structure is formed from tyres rammed with compacted earth. We have used tyres filled with compacted earth before for our ongoing straw shed project so that bit was fine. The rest was a little bit experimental.

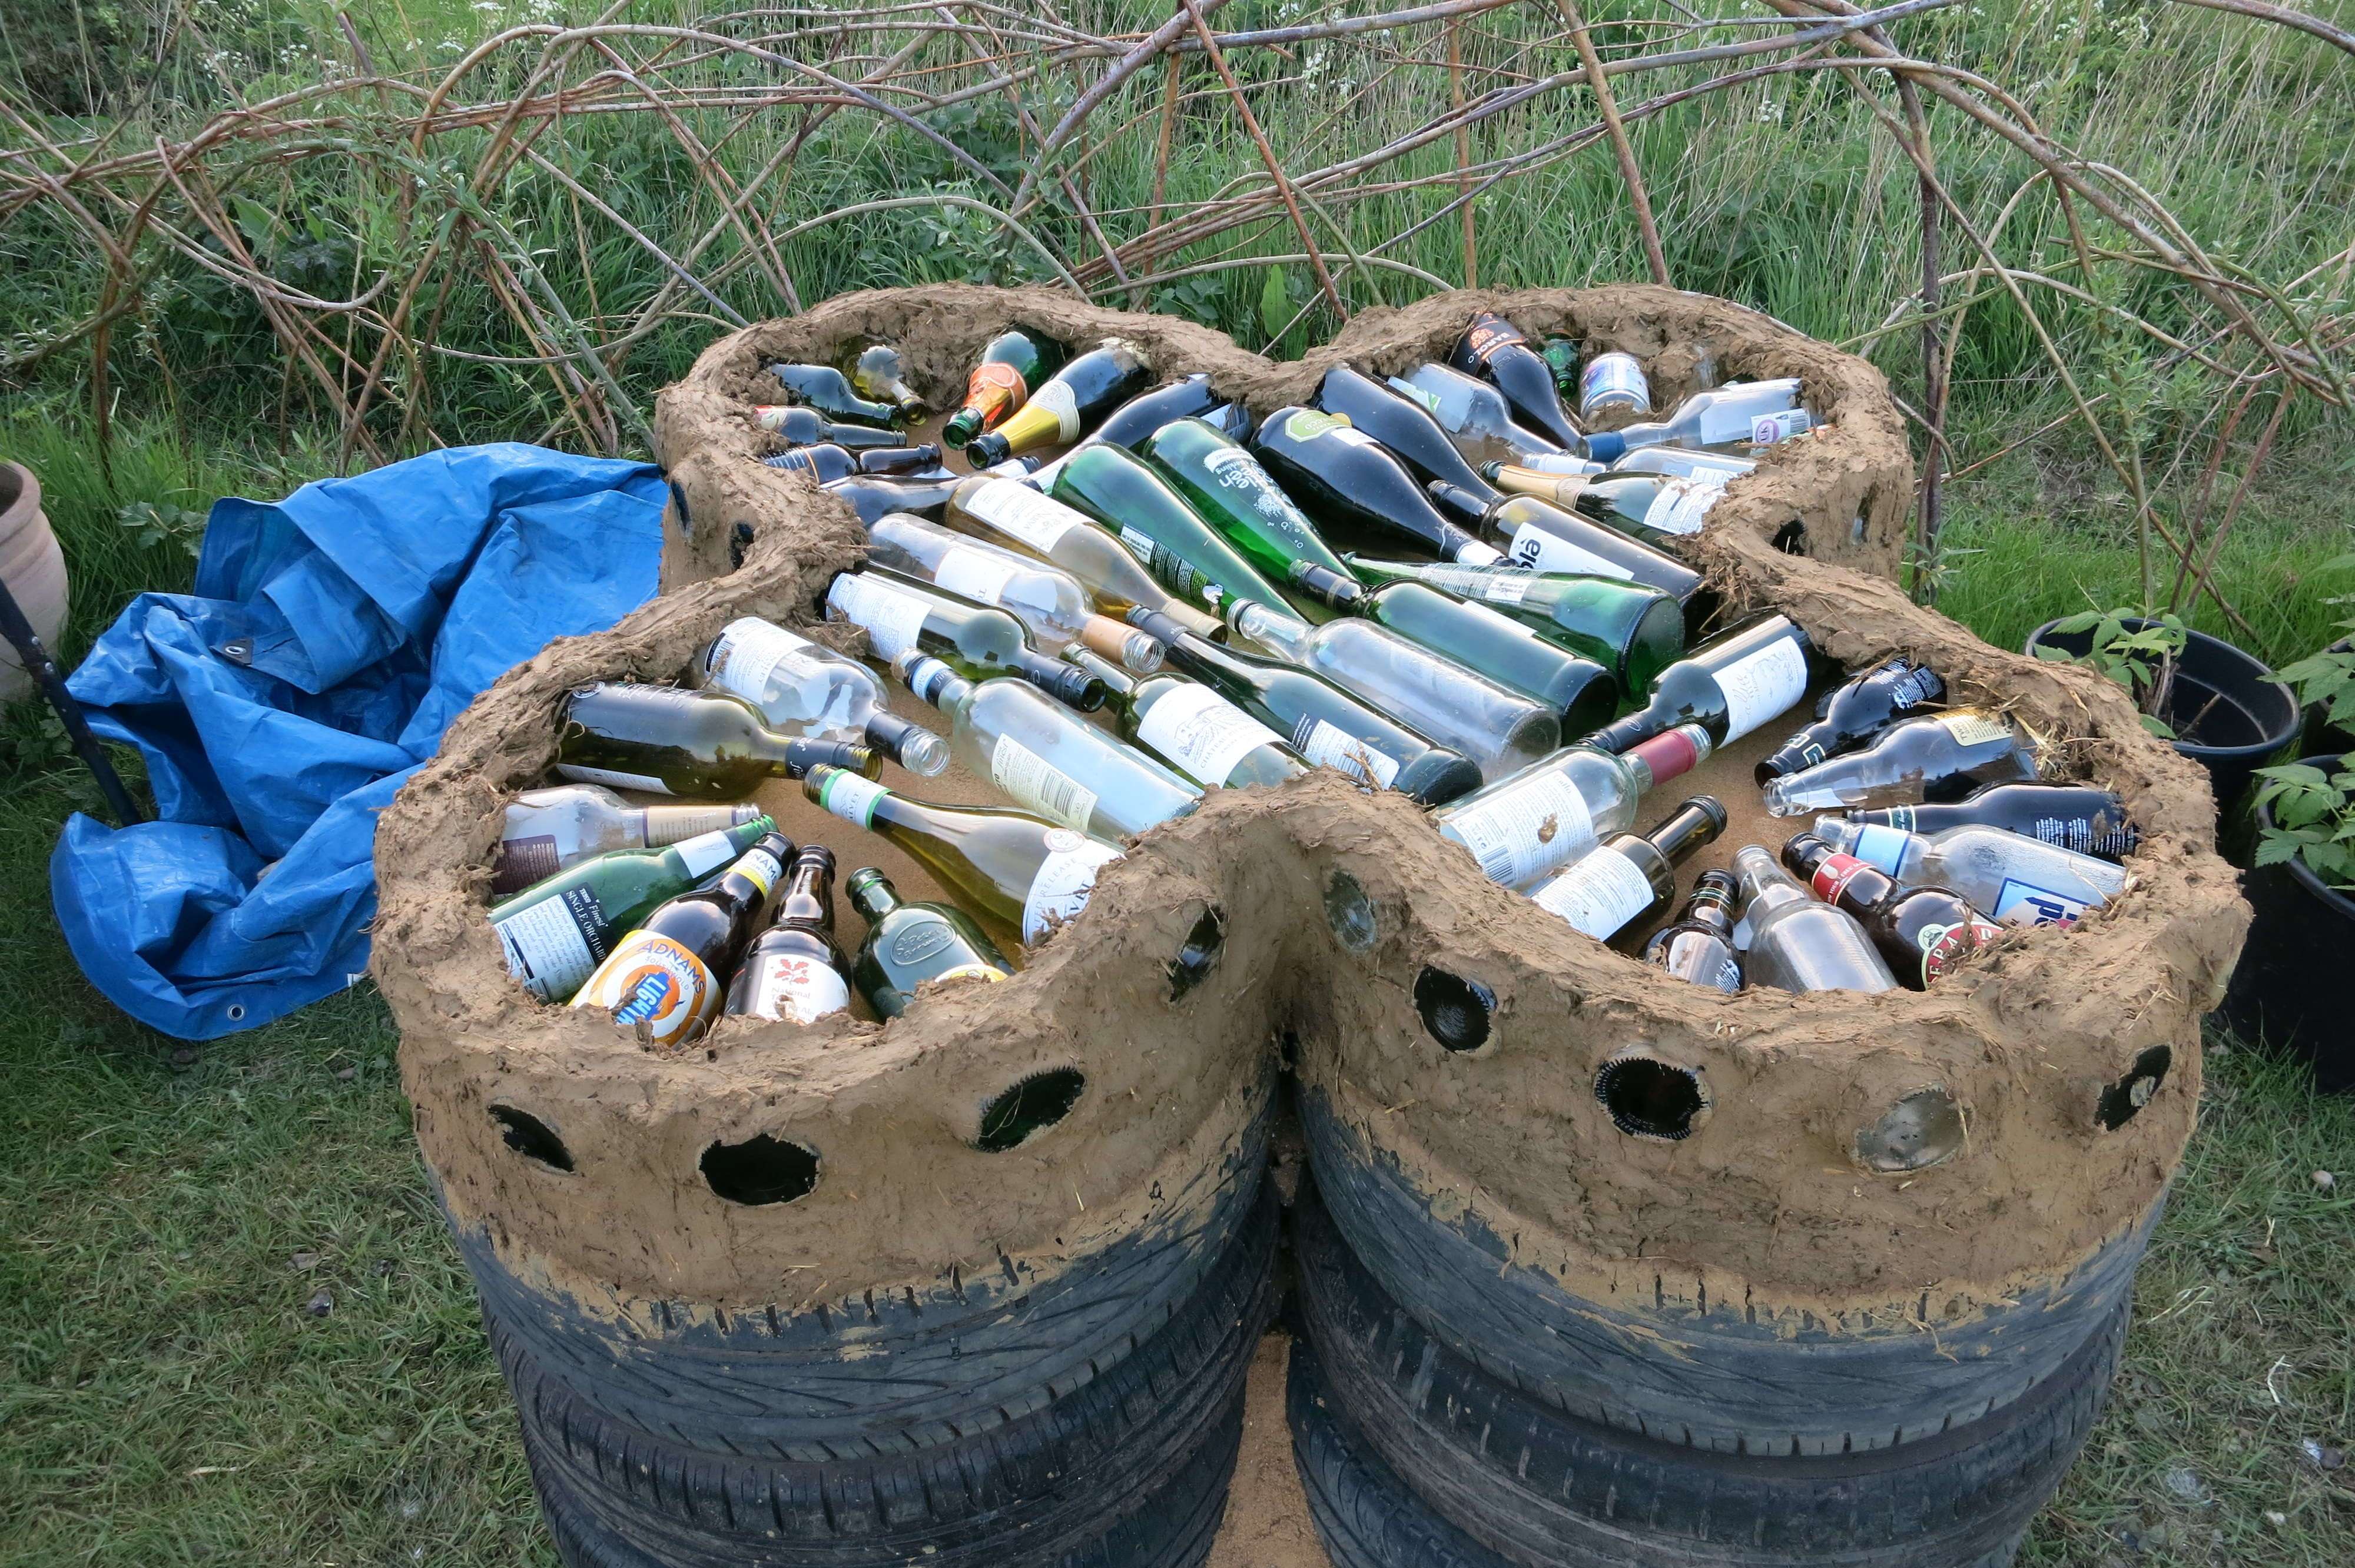
We laid four piles of tyres out in a four leaf clover shape so that they touched. Each pile was three tyres high. Then we filled them with gravel and sandy soil and jumped up and down on the piles until everything was firm.
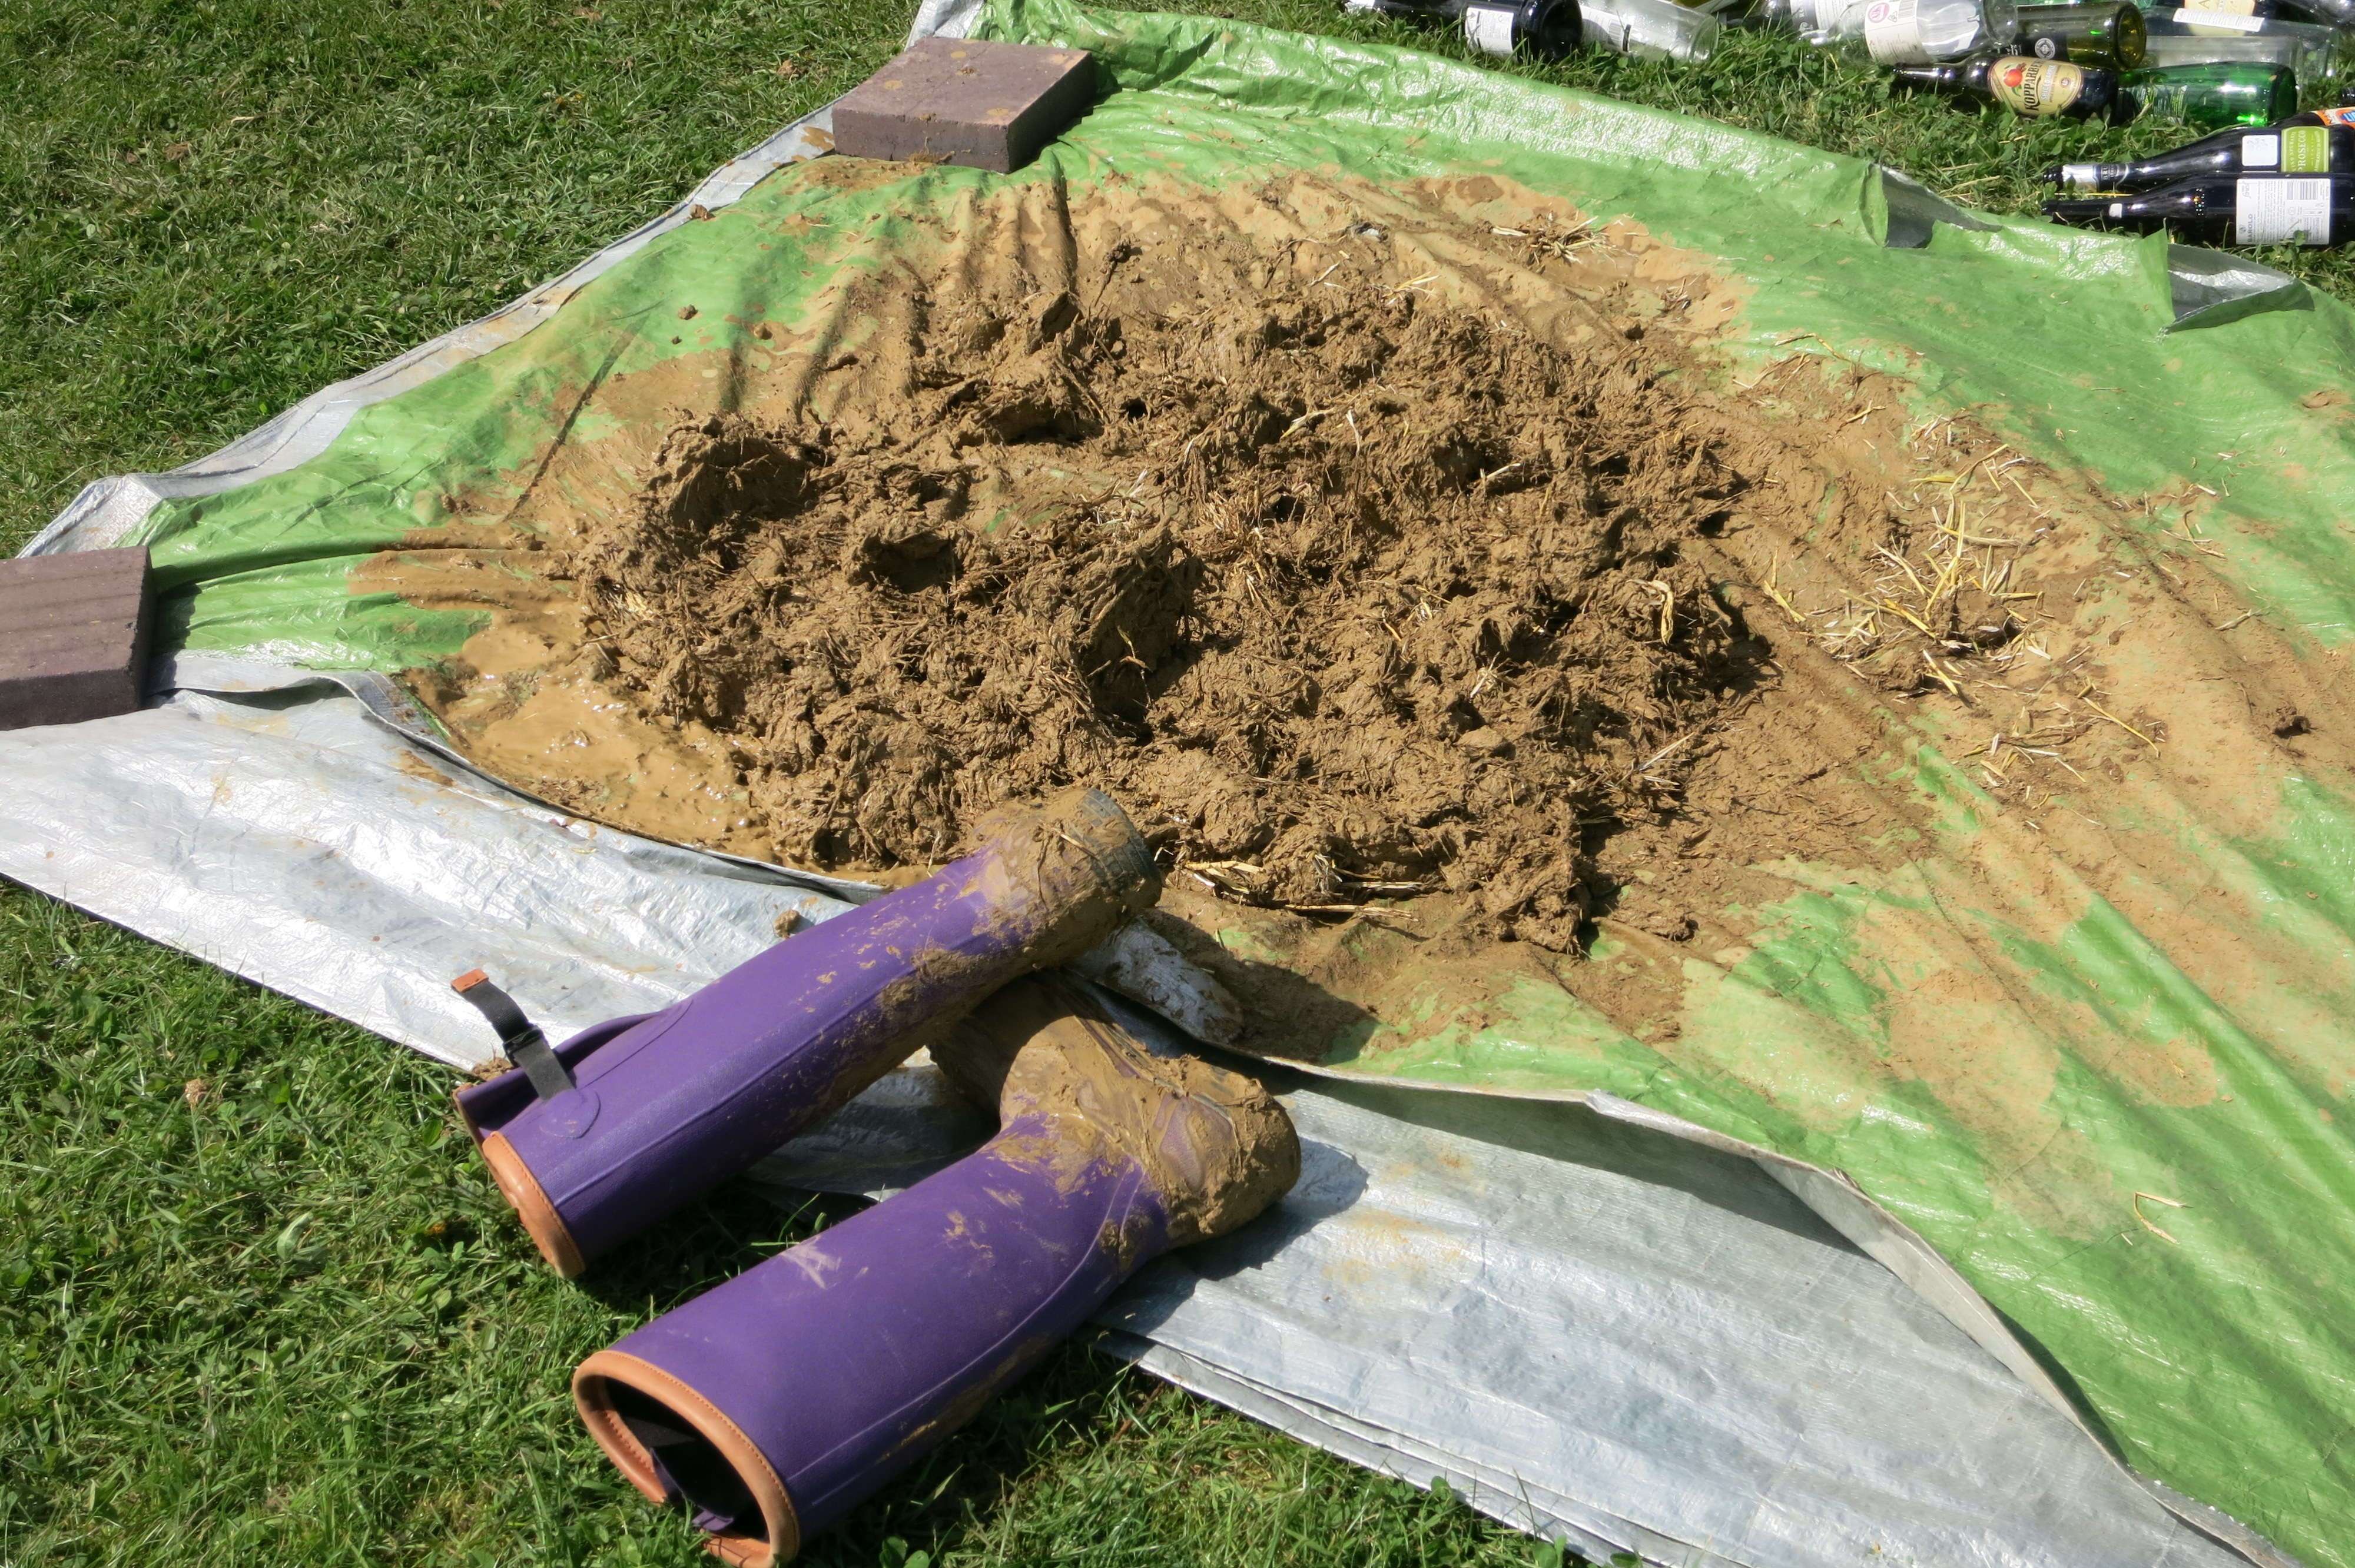
It was important that the heat from the clay pizza oven did not reach the tyres so we used our own homemade cob to create a wall around the top of the tyre base that was then filled with sand and a layer of empty glass bottles.

The cob was made by mixing pre-soaked clay with chopped straw from the farm. We are not 100% sure if the mix was right (mainly because we have not had the benefit of Sarah Partridge’s earth building expertise on the clay oven course yet!) but making it was good fun. I spent a lot of time stomping around in wellies and ended up looking a bit like Worzel Gummidge.
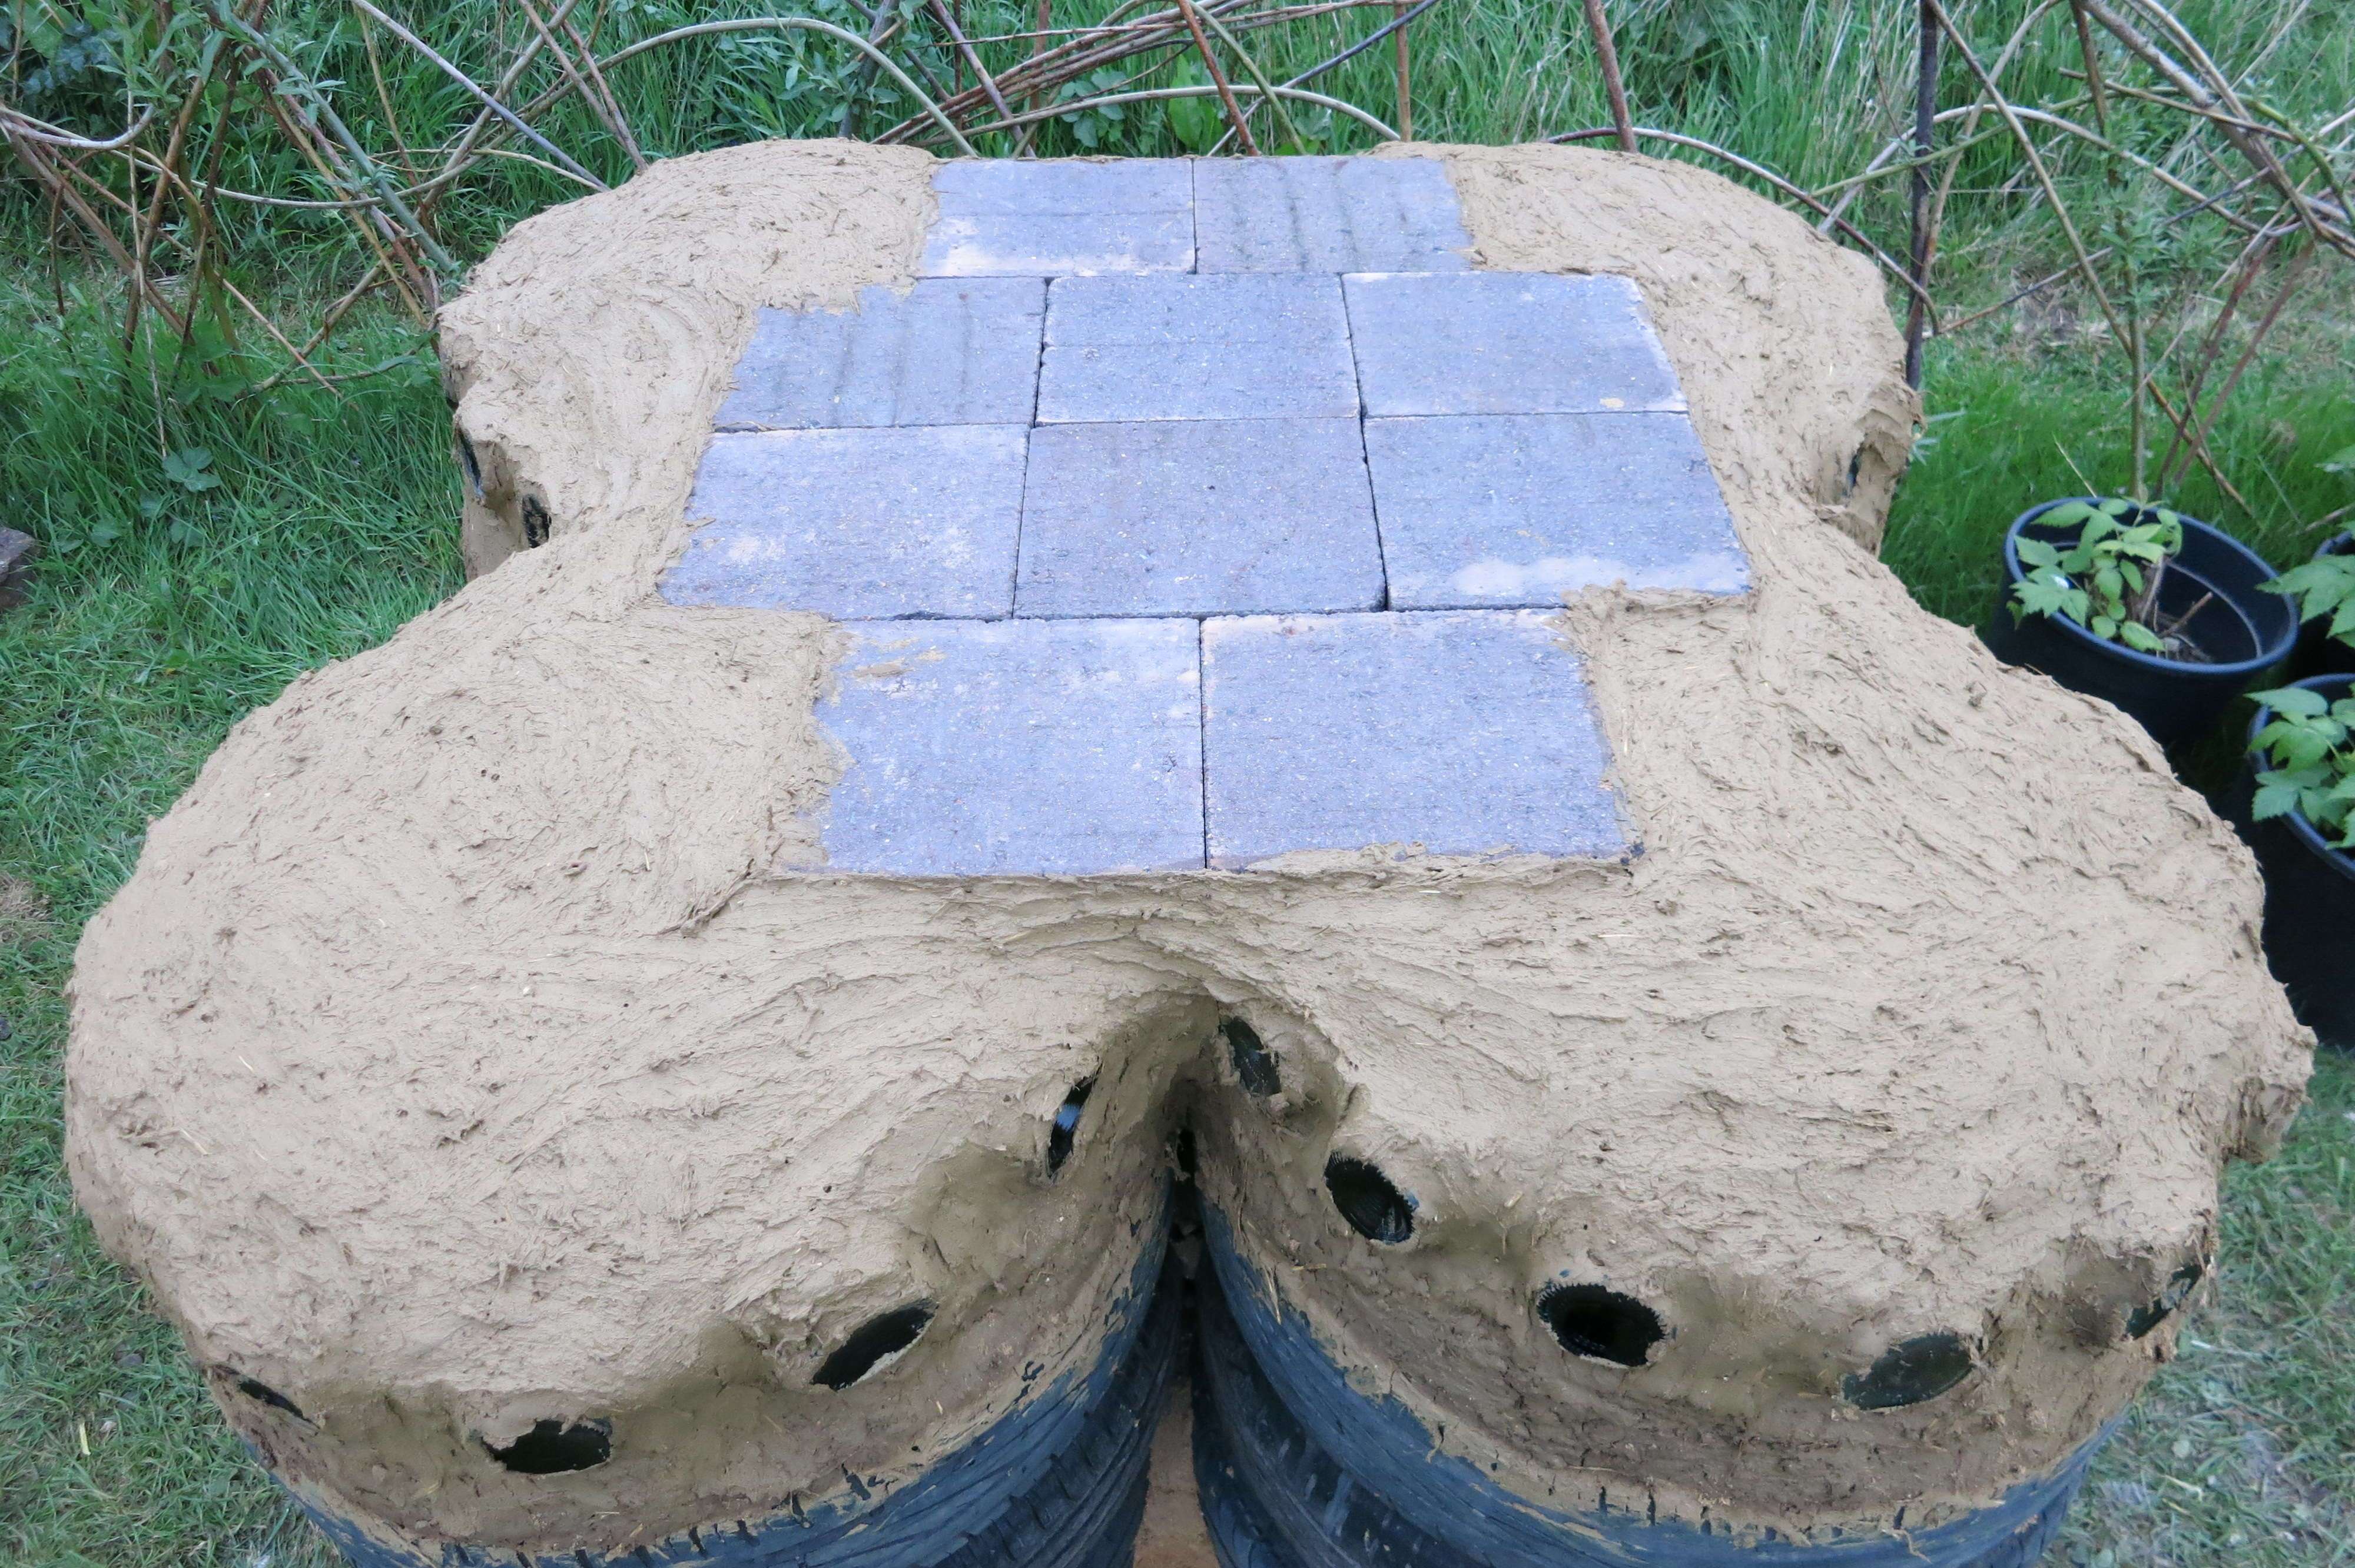
The heat bricks from the old storage heater were perfect for the floor of the oven. They were laid on top of the sand and bottles and secured in place with more cob. Eventually we will encase the tyres with chicken wire and apply more cob around the outside of the base. The whole structure will get a protective layer of lime render once the oven is complete and has dried out.
So now all we have to do is wait for the cob to dry over the next couple of weeks, fill any cracks and prepare another list of ‘ingredients’ for the clay oven course on 11th May. I can smell the pizza already!